“A picture is worth a thousand words.”
We’ve all heard this familiar phrase, but when it comes to our students, it can mean so much more. For many of our students, seeing something can make it easier to understand, remember, communicate, and act on. A visual can turn a complicated verbal direction into a simple sequence, make an unfamiliar routine feel more predictable, or give a student the confidence to complete a task independently.
As speech-language pathologists, teachers, and parents, we use words all day long. We explain, remind, prompt, question, and encourage. But sometimes, words alone aren’t enough. That’s where visual supports come in. From articulation cues and graphic organizers to visual schedules, sequencing cards, and picture choices, visuals can provide students with information they can see, process, and refer back to when they need it.
Visual supports can be especially helpful for students who have difficulty processing spoken language, remembering verbal information, organizing their thoughts, navigating transitions, or understanding abstract concepts. But the benefits aren’t limited to students with specific communication or learning needs. Visuals can help all kinds of learners. And when we use them intentionally, visuals can do much more than improve understanding. They can help reduce anxiety, prepare students for transitions, build confidence, encourage communication, and promote independence—during speech therapy, in the classroom, and at home.
So, let’s take a closer look at the power of visual supports and some simple ways you can use them with your students.

What Are Visual Supports?
Visual supports are tools that use pictures, symbols, written words, or other visual information to help students understand and communicate. They can be as simple as a picture showing a student where to put their backpack or as detailed as a visual schedule showing everything that will happen during the school day.
Some common examples include:
- Visual schedules
- Articulation cues
- Picture choices
- Graphic organizers
- Sequencing cards
- Visual checklists
- Social stories and visual supports
- Feelings charts
- Conversation supports
- Visual timers
- Written prompts
Many students can benefit from visual supports, regardless of their specific communication or learning needs.

Why Are Visual Supports So Helpful?
One of the biggest advantages of a visual is that it doesn’t disappear when we stop talking.
When we give a student a verbal direction, the student has to listen, understand, remember, and act on that information. For some students, that’s a lot to manage at once. A visual gives students something concrete that they can look at, reference, and return to as needed.
Let’s take a closer look at some of the ways visuals can support our students.

Visuals Improve Understanding
Imagine telling a student: “First put your paper in the folder, then put your pencil away, and finally get your backpack.”
That’s a lot of information to remember! Now imagine showing the student a simple three-step visual:
1. Paper in folder → 2. Pencil away → 3. Get backpack
The student can look at the visual while completing each step rather than trying to remember the entire direction.
Visuals can support understanding of:
- New vocabulary
- Directions
- Questions
- Academic concepts
- Stories and narratives
- Social situations
- Sequences and routines
- Expectations

Visuals Can Reduce Anxiety
Uncertainty can be stressful for children. What’s going to happen? What are we doing next? When will this activity be over? Visual supports can help answer these questions. A visual schedule provides predictability by showing students what they can expect. This can be especially helpful for students who need additional support with transitions or executive functioning skills.
Visual supports can also be especially helpful when there is going to be a change in the usual routine. If the class normally goes to music on Monday but there will be an assembly instead, a visual can help prepare students for that change.
When students know what to expect, they may feel more comfortable and this will help reduce their anxiety.

Visuals Build Confidence and Independence
One of my favorite benefits of visual supports is the way they can encourage independence.
Think about how often adults provide verbal prompts:
- “What’s next?”
- “Put your materials away.”
- “Now get your backpack.”
- “Don’t forget your folder.”
- “Go wash your hands.”
While reminders are sometimes necessary, a visual can give the student a way to access that information without needing an adult to provide every prompt.
For example, a student might have a visual showing:
1. Get soap
2. Wash hands
3. Rinse
4. Dry hands
Instead of an adult verbally explaining the routine every time, the student can refer to the visual. That’s an important shift. We’re not simply completing a task for the student. We’re giving the student a tool that helps them complete the task more independently. And when students experience success, their confidence grows!
Visual Supports During Speech Therapy
As SLPs, we have countless opportunities to incorporate visuals into our therapy sessions. Here are a few examples:
1. Articulation Visuals
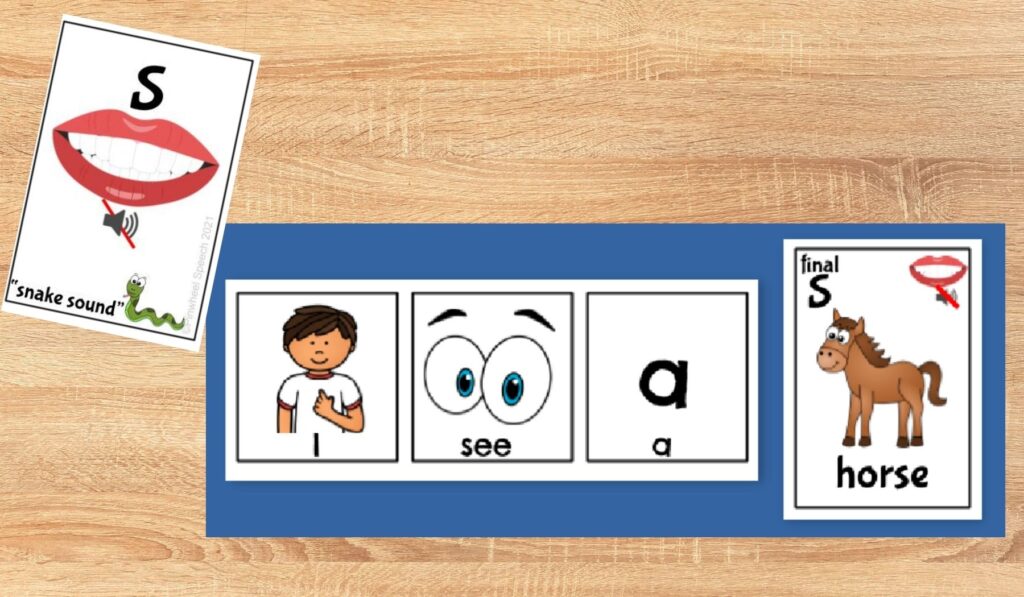
Articulation visuals can help students understand where and how to make a sound.
For example, a visual might show:
- Tongue placement
- Lip position
- Airflow
- Voice/no voice
- A picture cue for the target sound
Instead of relying on verbal explanations such as “Put your tongue behind your teeth,” we can give students something they can actually see. Visual articulation cues can also help students remember what they’ve learned between sessions.
* If you are looking for a comprehensive speech sound system that includes mouth visuals, you might be interested in this Articulation System by Pinwheel Speech.
2. Graphic Organizers
Graphic organizers are another excellent form of visual support. For example, instead of asking a student to organize a story entirely in their head, a story map can visually show the characters, setting, problem, events, and solution. The visual gives the student a framework for organizing information and expressing their ideas.
Graphic organizers support language organization by providing a visual structure for the student’s thoughts.
They can be used for:
- Story retelling
- Main idea and details
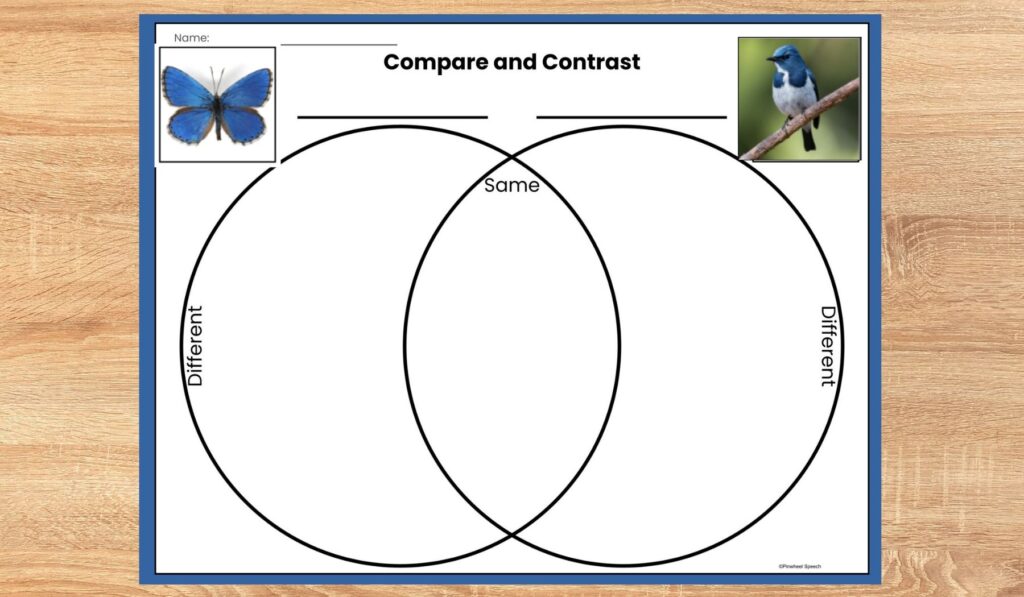
- Compare and contrast (Compare and Contrast with a Venn diagram)
- Problem and solution
- Answering WH questions (WH Question cards with visuals)
- Describing
- Making inferences
3. Sequencing Visuals
Sequencing activities are helpful for both receptive and expressive language. Learn more about Sequencing activities HERE
Students can use pictures to sequence steps to:
- Follow a routine
- Retell a story
- Describe an activity
- Explain how to do something
- Practice temporal concepts: First → Next → Then → Last
- Answer sequencing questions
4. Visual Choices
Sometimes students know what they want to say but have difficulty finding the words. Offering visual choices can make communication easier. Visual choices can support vocabulary, requesting, commenting, and participation while reducing the pressure of having to generate a response completely independently.
5. Picture Scenes
Picture scenes are another powerful visual support for speech and language therapy. A single picture scene can provide students with a visual context for practicing a wide variety of communication skills.
Instead of asking a student to come up with a topic or imagine a situation, a picture scene gives them something concrete to look at, talk about, and explore. The visual information in the scene can help students understand questions, organize their thoughts, and generate language.
You can find a variety of Picture Scenes in the Pinwheel Speech shop. Learn more about Picture Scenes in this Blog post!
6. Social and Emotional Visuals
Visuals can also support social communication and emotional learning. These supports can make abstract social concepts more concrete and easier to discuss.
Consider using:
- Feelings visuals
- Facial expression visuals
- Social scenarios
- Conversation supports
- Problem-solving visuals
- Expected/unexpected behavior visuals
- Visual reminders for social phrases
Visual Supports in the Classroom
Visual supports shouldn’t stop when students leave the speech therapy room. Teachers can use visuals throughout the school day to support:
- Classroom routines
- Classroom schedule
- Transitions
- Following directions
- Academic concepts
- Independent work
- Organization
- Classroom expectations
- Social-emotional learning
Teachers can also use visual directions for classroom activities. The student can refer to the visual instead of waiting for an adult to repeat the directions. For example, a writing center might have visuals showing:
1. Choose a paper
2. Write your name
3. Write your sentence
4. Draw a picture
5. Put your work in the finished basket

Visual Supports at Home
Visual supports can be just as useful at home! Parents can use them to make daily routines more predictable and encourage independence.
Consider creating visual sequences for:
- Getting ready for school
- Getting dressed
- Brushing teeth
- Washing hands
- Cleaning up toys
- Completing homework
- Getting ready for bed
- Making a snack
- Completing chores
A visual doesn’t have to be fancy or professionally designed. A few simple pictures or photographs can be enough. For example, a bedtime routine might look like:
Bath → Pajamas → Brush Teeth → Story → Bed

How to Make Visual Supports Effective
Creating visual supports is only the first step. We also need to teach students how to use them.
Here are a few tips:
1. Keep It Simple
Avoid putting too much information on one visual. Make sure the student can easily identify what they need to know.
2. Make It Meaningful
Use pictures, symbols, or words that the student understands. When appropriate, photographs of the student’s actual classroom, materials, or routines can be especially meaningful.
3. Put It Where It Is Needed
A visual should be accessible when the student needs it. A handwashing visual belongs near the sink. A classroom routine visual should be easy for students to see. An articulation cue should be available during speech practice.
4. Use Visuals Consistently
If you’re introducing a visual schedule, use it consistently enough that students learn to rely on it.
5. Teach the Student How to Use It
Don’t assume that a student automatically knows what a visual means. Model how to look at it, follow it, check off completed steps, etc.
6. Fade Visual Support When Appropriate
The ultimate goal isn’t necessarily for students to rely visual supports forever. As students become more familiar with a routine or skill, some visual supports may be reduced or modified. The goal is greater independence, not simply more visuals.

Final Thoughts
Visual supports are much more than colorful pictures or classroom decorations. They are tools that can help students understand complex information, follow directions, communicate their ideas, manage transitions, feel more confident, and become more independent.
Whether you’re an SLP working on articulation and language skills, a teacher supporting classroom routines, or a parent helping with daily activities, visuals can provide an extra layer of support when words alone aren’t enough. And sometimes, the simplest visual can make the biggest difference. When we give students something they can see, we give them another way to understand, communicate, and succeed.